
How to Make a Dried Flower Crown
Step-by-Step Tutorial Instructions for a Beautiful, Natural Flower Crown
Time needed: around 45 minutes.
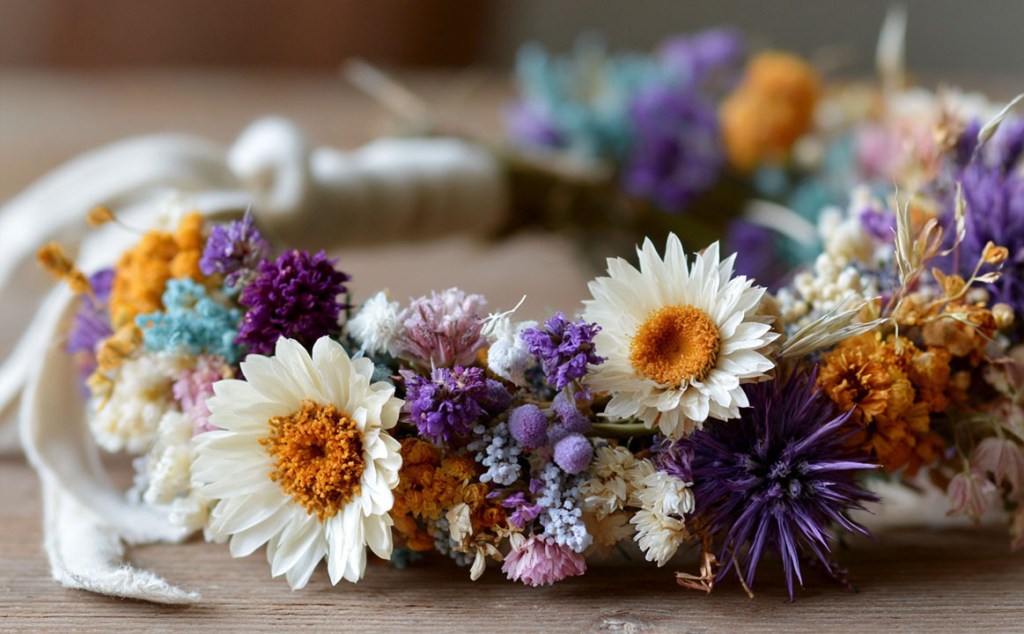
A dried flower crown is one of the simplest and most beautiful floral pieces you can make at home. Whether it’s for a wedding, prom, festival, baby shower or photoshoot, dried flowers create a soft, timeless look that lasts far beyond the day itself. This method uses a wire base, florist tape and ribbon so the crown is fully adjustable for adults and children.
Materials Needed

Scissors & Wire Cutters
Floral Wire
(24 gauge)
Florist Tape
Dried Flowers & Foliage (40-60 small stems)
Ribbon (1.2m-2m)
Step-by-Step DIY Dried Flower Crown Tutorial
Before you start, prepare all your stems and bundles first. This makes the assembly smoother and helps your crown end up looking more balanced. Choose flexible dried stems where possible, as they’re easier to shape around the wire base.
Step 1 – Create the Base
Make an adjustable crown base

Step 2 – Prepare Your Flowers
Trim and Create Small Bunches

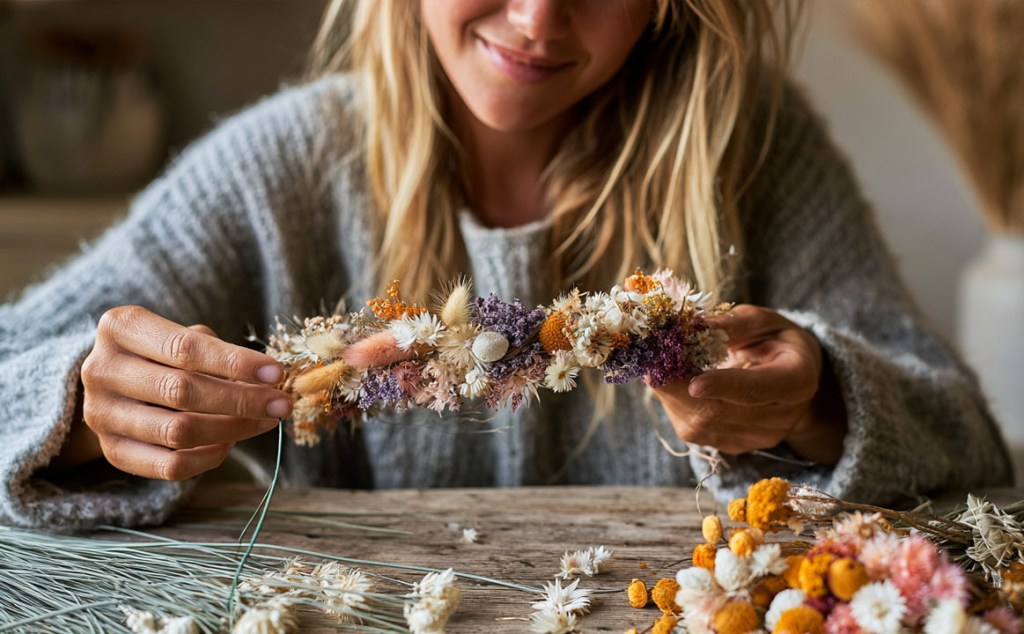
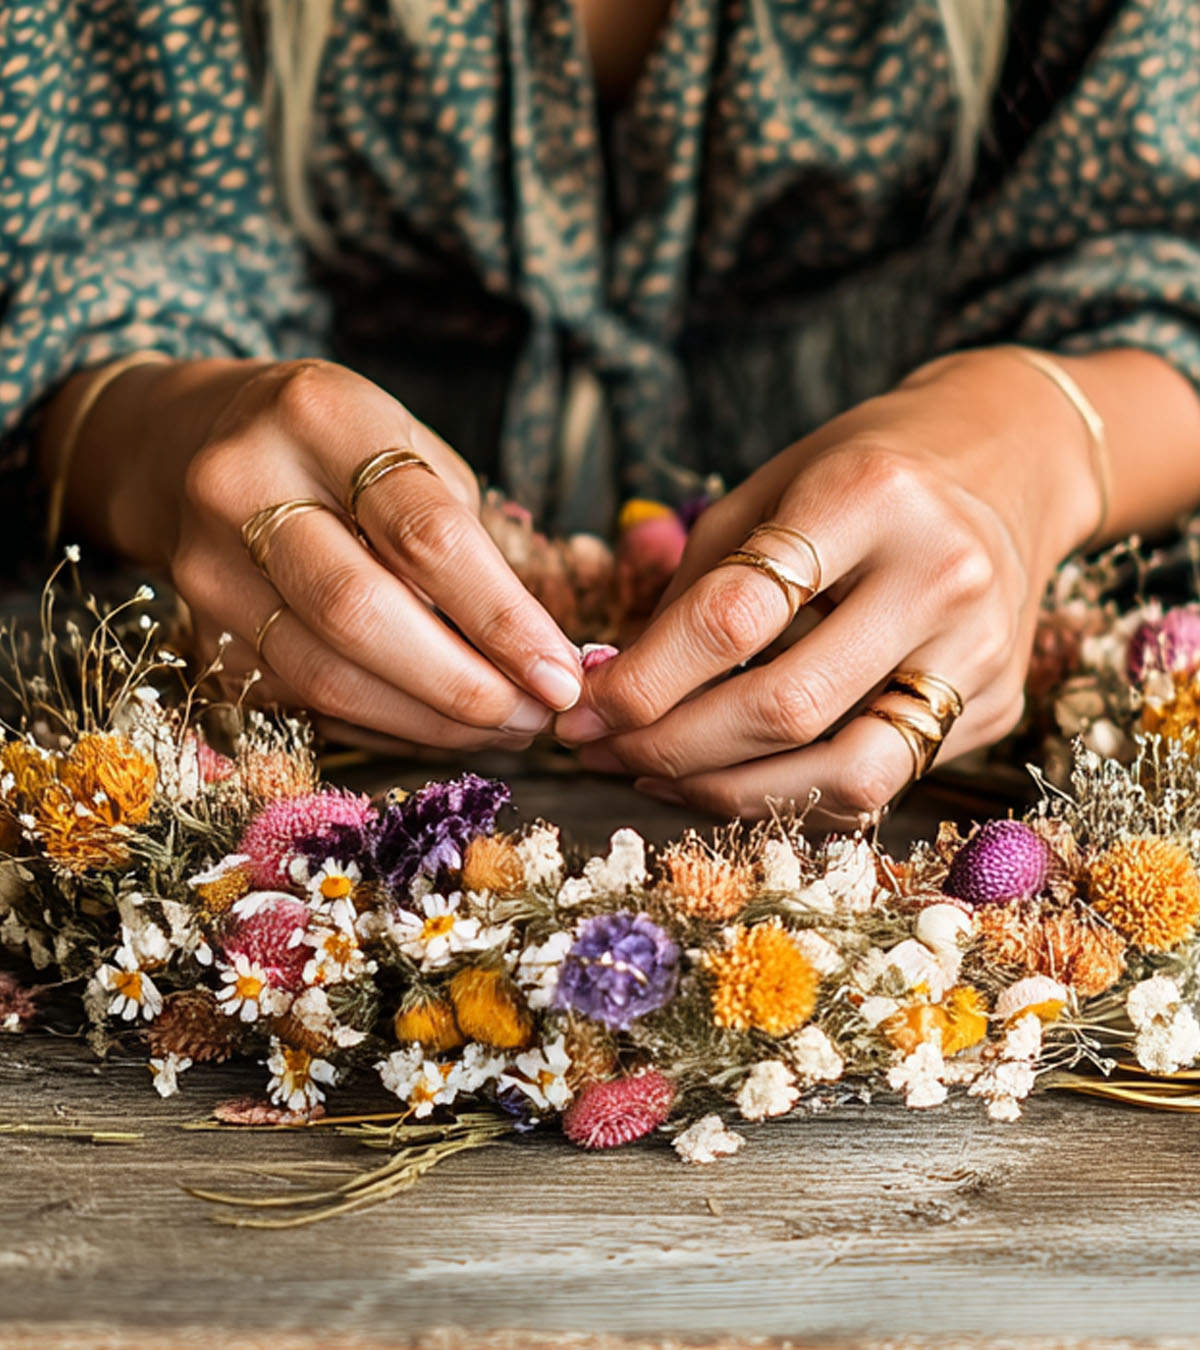
Step 3 – Attach The Flowers
Wrap and Secure Floral Bunches
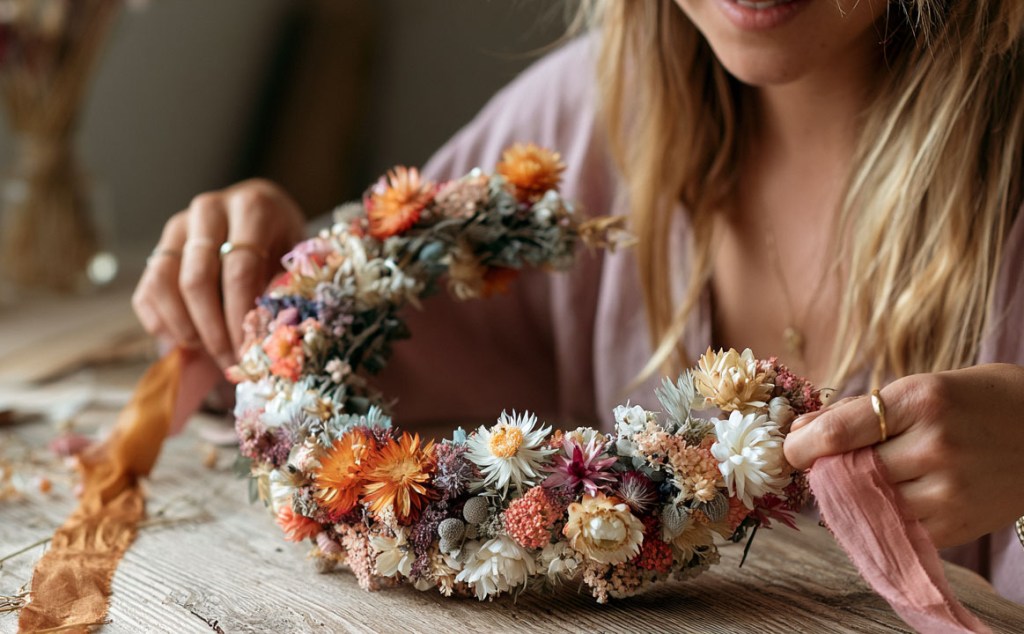
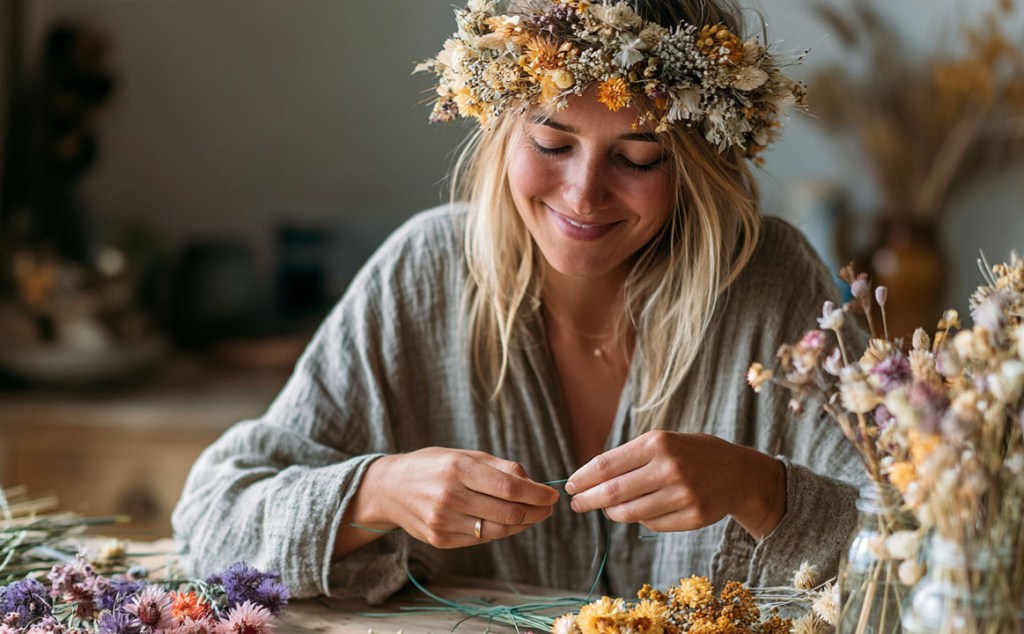
Step 4 – Finish & Adjust
Add Ribbon and Adjust Fit
Troubleshooting
Crafting with dried flowers can be delicate, so here are quick fixes for the most common issues people run into while making a full crown.
My bundles feel loose
If a bundle shifts or lifts away from the base, add an extra wrap of florist wire around the stems. You can then cover the wire with florist tape, ribbon or jute string to keep the finish soft and comfortable.
The crown feels scratchy or uncomfortable
Wrap the wire base with florist tape, ribbon, or jute string before adding flowers. This soften the feel against your head and hides any sharp edges.
The shape looks uneven
Alternate between shorter and slightly longer bundles as your attach them. Step back every few bundles and check the curve of your crown – small adjustments early on prevent big corrections later.
A bundle is sticking out at an odd angle
Rotate the final bundle on each side slightly inward so it follows the natural curve of the crown. This prevents a single bunch from jutting out.
My flowers keep snapping
Some dried stems are brittle, especially thin or woody varieties. To soften them slightly, you can place stems in a sealed container in the fridge for around 30 minutes. The cool, slightly humid environment helps them regain a touch of flexibility, making them less likely to snap when you bend or trim them.
If they are still fragile, shorten the stems a little more or choose naturally flexible varieties like limonium, statice or grasses.
Why the fridge trick works: It doesn’t ‘rehydrate’ the flowers (you don’t want that) but it gives them a tiny bit of pliability – just enough to stop cracking.
Important note: You should never mist or steam dried flowers to soften them – that ruins the colour and structure. The fridge method is the safest and gentle option.
Gaps are showing between bundles
Increase the overlap between bundles or add a small filler stem (like a grass or tiny flower) to disguise any visible spaces.
FAQs
Can I use fresh flowers instead of dried?
Yes, but fresh flowers will only last a few hours. Dried flowers last months or even years if stored well.
How long does a dried flower crown last?
With gentle handling and dry storage, a dried crown can last indefinitely. Colours may soften over time which adds to the natural look but keeping them out of sunlight prolongs the life of the colours.
What wire gauge should I use?
24-gauge is ideal – flexible enough to shape but strong enough to hold the structure.
Can I make this the day before the event?
Absolutely. Dried flowers won’t wilt, so you can make the crown well in advance.
How do I store the crown?
Keep it somewhere dry, out of direct sunlight and away from humidity.
Have a question that’s not answered here? Check out our full FAQ page.
Care Instructions
Dried flowers are delicate but long-lasting. Store your crown somewhere dry and out of direct sunlight to prevent colours from fading. Avoid crushing or bending the flowers and handle the crown by the wire base rather than the petals. If dust gathers over time, gently blow it away or use a soft brush. For long-lasting results, follow our simple dried flower care guide to keep your stems looking their best.
Style Variations
Minimal Crown
Use fewer bundles and keep stems shorter for a lighter, more delicate finish.
Asymmetric Crown
Cluster more flowers on one side and taper the rest for a modern, editorial look.
Wild Meadow Crown
Use airy grasses and longer stems to create a loose, natural meadow-inspired shape.
Half Crown
Decorate only the front half of the wire base for a lighter, more casual style.
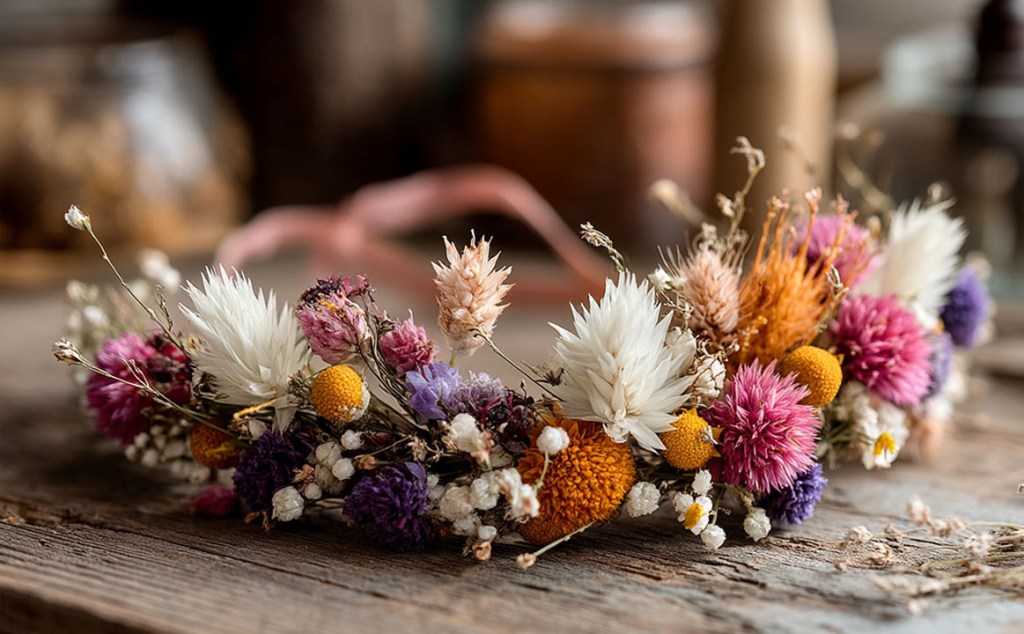
Enjoy Your Dried Flower Crown!
Your dried flower crown is now ready to wear. Because it’s made with dried stems, it will hold it’s shape beautifully and can be enjoyed long after the moment you made it for. Take a moment to adjust the ribbon, settle the crown comfortably and shape any final details with your fingers. Whether you’ve create it for a celebration, a photoshoot or simply for the joy of crafting, each crown is unique – shapes by your flowers, your hands and your style.
If your growing your own stems, our growing tips guide will help you choose and care for flowers from seed to bloom for strong, healthy flowers. If your new to gardening, our flower growing advice covers everything from soil preparation, to harvesting at the right stage.
Want to see more DIY dried flower projects? View our tutorials page.
How to Make a Dried Flower Crown
Step-by-Step Tutorial Instructions for a Beautiful, Natural Flower Crown
Time needed: around 45 minutes.
A dried flower crown is one of the simplest and most beautiful floral pieces you can make at home. Whether it’s for a wedding, prom, festival, baby shower or photoshoot, dried flowers create a soft, timeless look that lasts far beyond the day itself. This method uses a wire base, florist tape and ribbon so the crown is fully adjustable for adults and children.
Materials Needed
Scissors & Wire Cutters
Floral Wire
(24 gauge)
Florist Tape
Dried Flowers & Foliage (40-60 small stems)
Ribbon (1.2m-2m)
Step-by-Step DIY Dried Flower Crown Tutorial
Before you start, prepare all your stems and bundles first. This makes the assembly smoother and helps your crown end up looking more balanced. Choose flexible dried stems where possible, as they’re easier to shape around the wire base.
Step 1
Create the Base
Make an adjustable crown base
Step 2
Prepare Your Flowers
Trim and Create Small Bunches
Step 3
Attach The Flowers
Wrap and Secure Floral Bunches
Step 4
Finish & Adjust
Add Ribbon and Adjust Fit
Troubleshooting
Crafting with dried flowers can be delicate, so here are quick fixes for the most common issues people run into while making a full crown.
My bundles feel loose
If a bundle shifts or lifts away from the base, add an extra wrap of florist wire around the stems. You can then cover the wire with florist tape, ribbon or jute string to keep the finish soft and comfortable.
The crown feels scratchy or uncomfortable
Wrap the wire base with florist tape, ribbon, or jute string before adding flowers. This soften the feel against your head and hides any sharp edges.
The shape looks uneven
Alternate between shorter and slightly longer bundles as your attach them. Step back every few bundles and check the curve of your crown – small adjustments early on prevent big corrections later.
A bundle is sticking out at an odd angle
Rotate the final bundle on each side slightly inward so it follows the natural curve of the crown. This prevents a single bunch from jutting out.
My flowers keep snapping
Some dried stems are brittle, especially thin or woody varieties. To soften them slightly, you can place stems in a sealed container in the fridge for around 30 minutes. The cool, slightly humid environment helps them regain a touch of flexibility, making them less likely to snap when you bend or trim them.
If they are still fragile, shorten the stems a little more or choose naturally flexible varieties like limonium, statice or grasses.
Why the fridge trick works: It doesn’t ‘rehydrate’ the flowers (you don’t want that) but it gives them a tiny bit of pliability – just enough to stop cracking.
Important note: You should never mist or steam dried flowers to soften them – that ruins the colour and structure. The fridge method is the safest and gentle option.
Gaps are showing between bundles
Increase the overlap between bundles or add a small filler stem (like a grass or tiny flower) to disguise any visible spaces.
FAQs
Can I use fresh flowers instead of dried?
Yes, but fresh flowers will only last a few hours. Dried flowers last months or even years if stored well.
How long does a dried flower crown last?
With gentle handling and dry storage, a dried crown can last indefinitely. Colours may soften over time which adds to the natural look but keeping them out of sunlight prolongs the life of the colours.
What wire gauge should I use?
24-gauge is ideal – flexible enough to shape but strong enough to hold the structure.
Can I make this the day before the event?
Absolutely. Dried flowers won’t wilt, so you can make the crown well in advance.
How do I store the crown?
Keep it somewhere dry, out of direct sunlight and away from humidity.
Have a question that’s not answered here? Check out our full FAQ page.
Care Instructions
Dried flowers are delicate but long-lasting. Store your crown somewhere dry and out of direct sunlight to prevent colours from fading. Avoid crushing or bending the flowers and handle the crown by the wire base rather than the petals. If dust gathers over time, gently blow it away or use a soft brush. For long-lasting results, follow our simple dried flower care guide to keep your stems looking their best.
Style Variations
Minimal Crown
Use fewer bundles and keep stems shorter for a lighter, more delicate finish.
Asymmetric Crown
Cluster more flowers on one side and taper the rest for a modern, editorial look.
Wild Meadow Crown
Use airy grasses and longer stems to create a loose, natural meadow-inspired shape.
Half Crown
Decorate only the front half of the wire base for a lighter, more casual style.
Enjoy Your Dried Flower Crown!
Your dried flower crown is now ready to wear. Because it’s made with dried stems, it will hold it’s shape beautifully and can be enjoyed long after the moment you made it for. Take a moment to adjust the ribbon, settle the crown comfortably and shape any final details with your fingers. Whether you’ve create it for a celebration, a photoshoot or simply for the joy of crafting, each crown is unique – shapes by your flowers, your hands and your style.
If your growing your own stems, our growing tips guide will help you choose and care for flowers from seed to bloom for strong, healthy flowers. If your new to gardening, our flower growing advice covers everything from soil preparation, to harvesting at the right stage.
Want to see more DIY dried flower projects? View our tutorials page.