
Dried Flower Growing Tips
Learn how to grow beautiful flowers for your garden and dried flower arrangements with these practical and clear tips.

Light

Water With Intention

Well-Drained Soil
Cut At The Right Stage

Airflow & Spacing

Nutrients
A Gentle Guide to Growing For Drying
Growing flowers specifically for drying is different from growing for fresh cutting.
You want strong straight stems, saturated colour, clean blemish-free petals, good airflow and predictable drying behaviour.
These dried flower growing tips bring together everything you need from germination to harvest. Grow dried flowers with confidence and intention.
- A Gentle Guide to Growing For Drying
- Seed Starting The Complete Guide
- Light-Dependent vs Darkness-Dependent Seeds
- Seedling Behaviour & Troubleshooting
- Hardening Off & Moving Outdoors
- Outdoor Growing Conditions
- Crop‑Specific Growing Guides
- Common Problems & How to Fix Them
- Advanced Dried Flower Growing Tips
- Explore More
- Dried Flower Growing Tips
- A Gentle Guide to Growing For Drying
- Seed Starting The Complete Guide
- Light-Dependent vs Darkness-Dependent Seeds
- Seedling Behaviour & Troubleshooting
- Hardening Off & Moving Outdoors
- Outdoor Growing Conditions
- Crop‑Specific Growing Guides
- Common Problems & How to Fix Them
- Advanced Dried Flower Growing Tips
- Explore More
Seed Starting
The Complete Guide


Light-Dependent vs Darkness-Dependent Seeds
Some seeds need light to germinate, while others require darkness — and getting this wrong is one of the most common causes of poor germination. Light‑dependent seeds such as statice, strawflower, gomphrena, ammobium alatum and craspedia should sit on the surface of the compost. Press them in gently and finish with a fine layer of vermiculite rather than compost; it holds moisture beautifully without blocking the light they need.
Other varieties prefer darkness to get started. Delphinium, achillea, bunny tail grasses, barley, millet, eryngium and globe thistle all benefit from being covered lightly after sowing. This thin layer helps create the darkness they need while still allowing enough airflow for healthy germination.
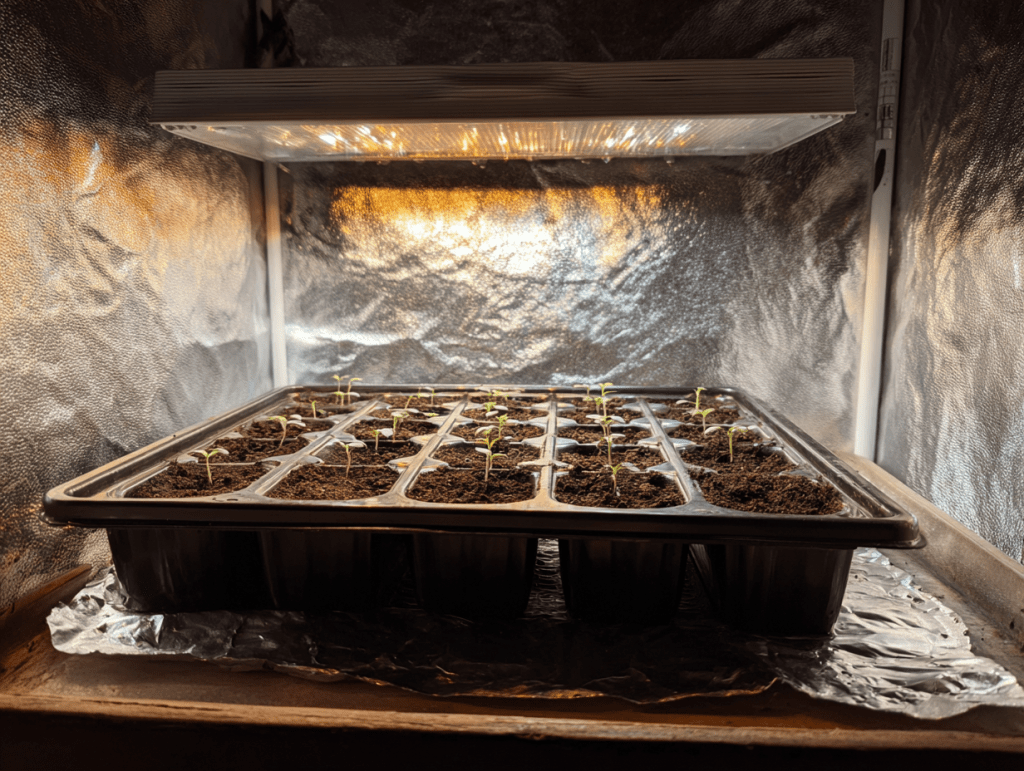
Heat Mats & Temperature Control
Most dried‑flower crops germinate best between 18–22°C, and a heat mat can be incredibly helpful for keeping temperatures steady during early spring or winter sowing. Once your seedlings emerge, remove the mat straight away — staying on bottom heat encourages them to stretch, producing thin, weak stems. If seedlings begin to grow rapidly upwards, develop pale, spindly stems or show leaves curling upward, they’re telling you they’re too warm and need cooler conditions.
Humidity Domes
Humidity domes are useful for germination but should be removed once seedlings begin to grow. Venting the dome daily helps prevent damping‑off, and once around half to two‑thirds of your seeds have sprouted, it’s time to take it off completely. If you notice heavy condensation dripping back onto the compost, the environment is too wet and needs more airflow.
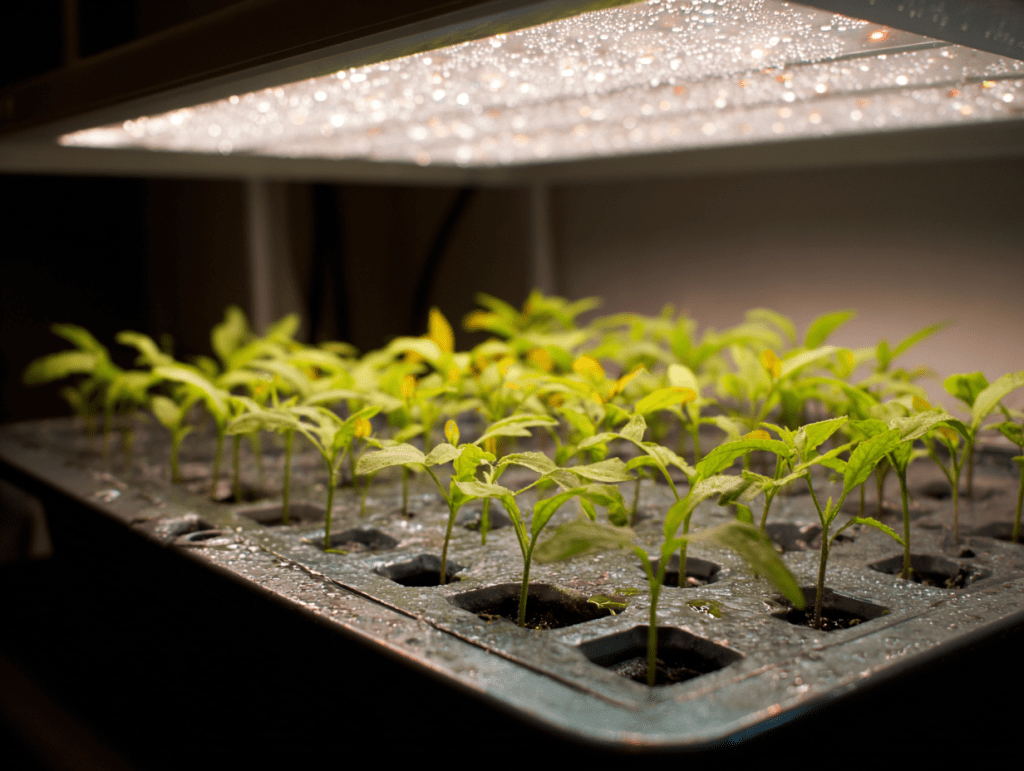
Grow Lights — Intensity, Duration & Distance
This is the stage where most growers struggle. Seedlings need far more light than a windowsill can provide — even a bright south‑facing window rarely reaches the intensity required for strong, compact growth. Using a simple phone app such as Illuminance – Lux Light Meter makes it easy to check your setup. Aim for around 5,000–8,000 lux for germination, increasing to 10,000–15,000 lux for early growth and up to 20,000 lux as plants approach hardening‑off.
Keep LED panels roughly 20–30 cm above the canopy and adjust the height weekly as seedlings grow. Too little light leads to legginess and weak growth, while too much can cause leaf stress, bleaching or crisp edges. Seedlings thrive with 14–16 hours of light per day, followed by a proper period of darkness — they need rest just as much as they need illumination.
Signs of insufficient light include leaning towards the source, long internodes and a pale green colour. Too much light, on the other hand, shows up as bleaching, downward‑curling leaves or crisping at the edges.
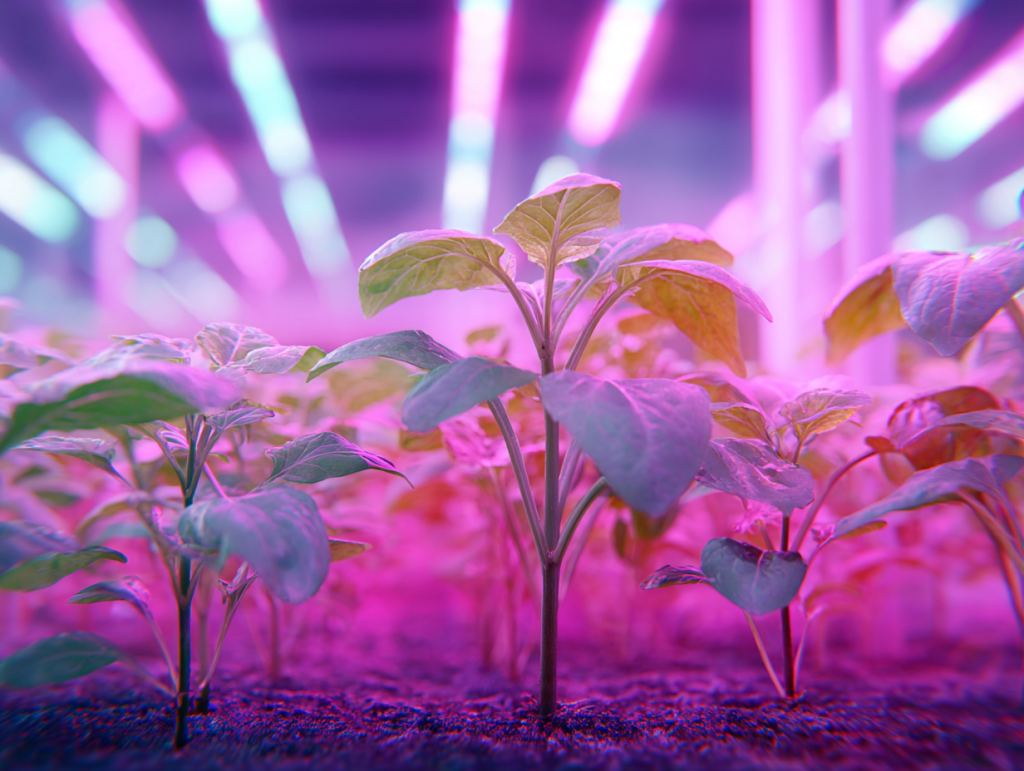
Light Colour & Spectrum (White vs Red/Blue Grow Lights)
Grow lights generally fall into two categories: full‑spectrum white or red/blue “blurple” lights. Both will raise healthy seedlings, but they behave differently. Full‑spectrum white LEDs mimic natural daylight and are by far the easiest to work with, especially for beginners. They give you a clear view of your plants, provide a balanced mix of wavelengths and encourage compact, naturally coloured growth. They’re also much more pleasant to have in your workspace.
Red/blue spectrum lights focus on the wavelengths plants use most efficiently — blue for compact, leafy growth and red for root and flower development. They can be slightly more efficient, but the harsh colour makes it harder to judge plant health, and they’re not necessary for the seedling stage. In practice, full‑spectrum white LEDs are ideal for seed starting and early growth because they offer excellent results without needing to fine‑tune anything. This is what I use for all my dried‑flower seedlings.
Reflective Foil & Light Maximisation
Lining the sides of your grow area with reflective foil or Mylar. (I’ve even used tin foil!) Lining the sides of your grow area with reflective foil or Mylar helps make the most of your lighting setup. Even simple kitchen foil works surprisingly well. Reflective surfaces bounce light back onto the seedlings, improving uniformity, reducing stretching and preventing plants from leaning in one direction. Just avoid placing foil too close to the lights, as it can create hotspots that stress young plants.
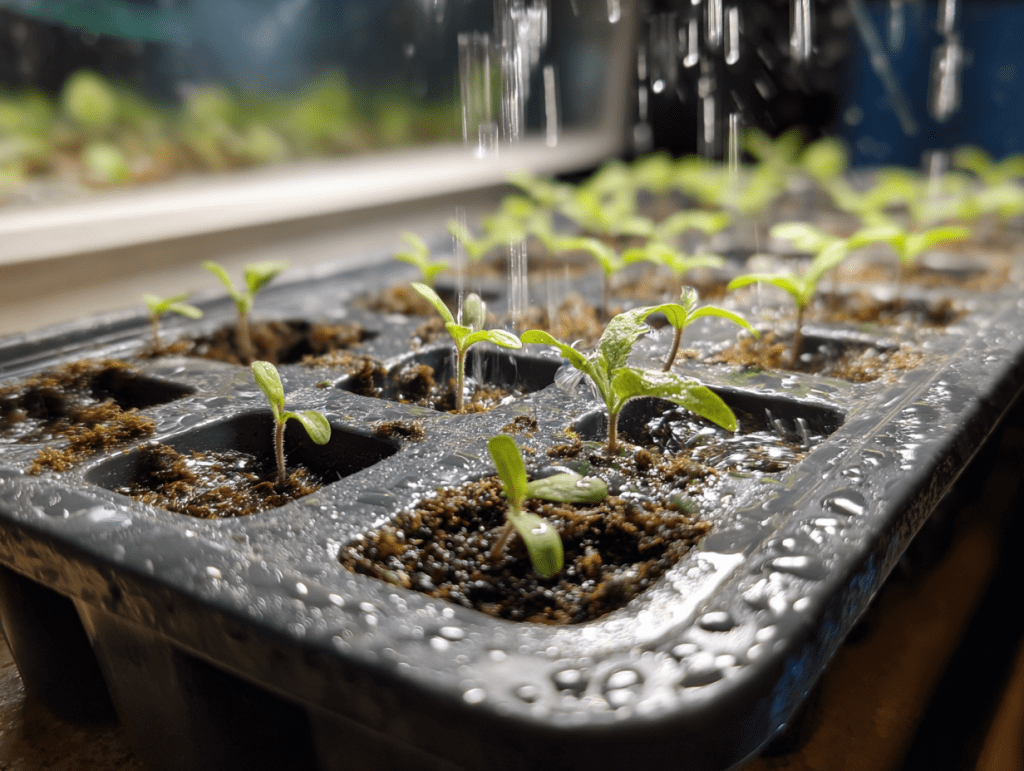
Watering Seedlings
Seedlings respond best to bottom‑watering, which keeps the foliage dry and reduces the risk of damping‑off. Fill the tray beneath your cells or pots for around 10–20 minutes, then pour away any excess so the roots aren’t left sitting in water. Consistency is key — too much water leads to yellowing, algae on the soil surface, soft stems and, in the worst cases, fungus gnats that can damage young roots. Too little water causes wilting, papery leaves and stalled growth. Aim for evenly moist compost that never swings to extremes.
Soil Mixes — The Flores & Bloom Standard
A well‑balanced soil mix will support your seedlings for months, which is especially important when you’re sowing early and plants spend longer in trays. I use a peat‑free compost as the base, ideally sieved to remove any larger woody pieces so the texture stays fine and even. To this, I add perlite for drainage and vermiculite for moisture balance, creating a structure that holds water without becoming heavy or compacted.
For nutrition, a small amount of blood, fish and bone provides slow‑release support, and a sprinkle of worm castings adds extra microbial life — not essential, but lovely if you have them. A touch of seaweed feed rounds out the mix with micronutrients that help seedlings stay strong and resilient. Seeds don’t need nutrients to germinate, but once they develop their first true leaves, they rely on this balanced mix to grow steadily, especially if they’ll be staying in trays for a while.
Seedling Behaviour & Troubleshooting
Why Some Flowers Bloom in Their Cells
Premature flowering is almost always a stress response. When seedlings experience too much heat, too little light, overcrowding, nutrient imbalance or become rootbound, they can switch into survival mode and begin blooming far earlier than they should. Paper‑textured flowers such as statice, strawflower and gomphrena are particularly prone to this, and the same applies to celosia and delphiniums. Once a plant decides to flower in its cell, it’s difficult to reverse, so keeping conditions steady is the best prevention.
Signs of Stress
Seedlings communicate their discomfort long before they fail, and learning to read these signals makes troubleshooting far easier. Purple leaves often point to cold stress or a phosphorus deficiency, while yellowing can indicate overwatering or a lack of nitrogen. Curling foliage usually means the plant is dealing with heat or light stress, and stunted growth is a classic sign of low light or a rootbound cell. Spotting these early allows you to adjust conditions before the plant diverts energy into survival behaviours like premature flowering.
Fungus Gnats
Fungus gnats thrive in damp compost, and once they appear, they can be frustratingly persistent. Their larvae feed on the delicate roots of young seedlings, sometimes severing them entirely — if a seedling snaps off at soil level with no roots attached, this is usually the culprit. Breaking the cycle requires a combination of cultural controls: bottom‑watering only, allowing the surface to dry between waterings, and adding a thin layer of sand or vermiculite to discourage adults from laying eggs. Sticky traps are excellent for reducing adult numbers, and if the infestation becomes severe, beneficial nematodes can help bring it under control.
Hardening Off & Moving Outdoors
Acclimatisation Schedule
Acclimatisation prevents shock when seedlings move from a controlled indoor environment to the unpredictability of outdoors. This transition is essential — sudden changes in temperature, wind or light can stunt growth, set plants back for weeks or, in the worst cases, kill them. A gentle, steady approach helps seedlings toughen up without becoming stressed.
A simple seven‑day plan works beautifully. For the first two days, place seedlings outside for one to two hours in full shade. On days three and four, increase this to three or four hours in dappled light. By day five, they can enjoy morning sun only, followed by half a day of sun on day six. By day seven, they should be ready for full sun and normal outdoor conditions. Always pause the schedule if night temperatures fall below 5°C (41°F), as cold stress can undo all their progress.
Netting for Straight Stems
Horizontal netting supports strawflowers, celosia, delphinium, achillea and grasses. Install early so stems grow through naturally.
Outdoor Growing Conditions
Soil Preparation
Most dried‑flower crops thrive in free‑draining, low‑fertility soil — but that doesn’t mean you need to strip your beds or avoid feeding altogether. The aim is simply to prevent the kind of rich, nitrogen‑heavy ground that encourages lush, floppy stems. A gentle, no‑dig approach works beautifully. Digging disrupts soil structure and the living ecosystem within it, so instead, remove weeds, loosen only the top layer if it’s heavily compacted, and plant directly into the bed.
Annuals
Annuals such as strawflower, statice, gomphrena, amaranthus and ornamental grasses perform best in soil that drains well, isn’t overly rich and has only light amendments. Preparing the bed can be as simple as working in a small amount of organic blood, fish and bone before planting. Add compost only if your soil is extremely poor or sandy, and avoid manure or high‑nitrogen feeds, which create soft stems and weak growth. This gentle approach gives annuals enough nutrition for the season without pushing them into lush, floppy foliage.
Perennials
Perennials like achillea, eryngium, globe thistle, lavender and delphinium benefit from a slightly different preparation. Dig a planting hole and sprinkle in mycorrhizal fungi to support strong root establishment, then add a handful of blood, fish and bone before backfilling and watering well. Avoid adding heavy organic matter — too much compost or manure leads to soft stems, flopping, mildew, reduced vase life, slower drying and weaker colour retention. Dried‑flower crops of all kinds perform far better in leaner soil, where they grow strong, upright and richly coloured.
No Dig Growing
A no‑dig approach works beautifully for dried‑flower crops. It protects soil structure, supports beneficial fungi and reduces weed pressure — all without the disruption of heavy digging. By keeping the soil ecosystem intact, you create a healthier, more resilient growing environment that your plants can tap into naturally.
To prepare a no‑dig bed, start by removing any surface weeds. Add a thin layer of compost only if needed — one to two centimetres is usually enough. If you’re working with heavy clay or dealing with persistent weeds, lay down cardboard first and then add a couple of inches of compost on top. Avoid turning or digging the soil beneath; simply plant directly into the bed, creating small holes where needed.
No‑dig works particularly well for dried flowers because it preserves the soil structure and the micro‑organisms that help deliver nutrients to your plants. It also protects the mycorrhizal networks that form natural partnerships with roots, improving nutrient uptake and overall plant health. With less compaction and a more stable soil environment, plants grow stronger, straighter and more abundant — and the reduced labour is always a welcome bonus. This gentle approach encourages strong, upright stems.
Worm Castings
Worm castings are the fine, dark, crumbly granules left behind after composting worms break down organic matter — they look a little like soft, earthy coffee grounds and are one of the most nutrient‑balanced soil amendments you can use. They’re incredibly gentle, packed with beneficial microbes and help seedlings access nutrients without overwhelming them or pushing soft, sappy growth. A small amount mixed into beds or seedling compost improves moisture retention, boosts soil life and supports steady, resilient development.
If you’d like a regular supply, a simple worm farm is easy to set up at home: a ventilated box, a layer of damp cardboard for bedding and a handful of composting worms are all you need. Feed them thin layers of kitchen scraps, keep the bedding moist but never wet, and within a few months you’ll have beautifully rich castings ready to sift into your soil — a slow, natural way to strengthen your plants from the ground up.
Using Mycorrhizal Fungi For Stronger Roots
Mycorrhizal fungi form a natural partnership with plant roots, helping them access water and nutrients far more efficiently. They’re especially valuable for perennials, slow‑establishing plants and anything with a deep or woody root system, which is why they pair so well with no‑dig gardening — digging can disrupt these delicate underground networks. They’re particularly beneficial for crops such as eucalyptus, achillea, eryngium, globe thistle, lavender, delphinium and physalis, all of which thrive when their roots can form strong, long‑term fungal connections. Plants treated with mycorrhizal fungi tend to establish more quickly, cope better with drought, and experience far less transplant shock, giving them a healthier foundation for years to come.
To apply it, simply sprinkle the granules directly onto the roots or into the planting hole before backfilling and watering well. It only needs to be used once at planting — it isn’t a fertiliser and doesn’t require reapplying. Once the fungi are in the soil, they remain there, continuing to support the plant throughout its life. It’s a small step that makes a noticeable difference, especially in lean or free‑draining soil, where plants benefit most from the improved access to moisture and nutrients.
Making Your Own Compost
Homemade compost is one of the best things you can add to your garden. It’s naturally balanced, gentle, and full of the biology your soil needs to stay healthy. Composting is simply the controlled breakdown of organic matter using oxygen, moisture and heat. When these three elements are in balance, the heap warms up and decomposes efficiently, turning garden waste into a rich, crumbly material that continues feeding your soil long after you’ve spread it.
At its core, composting is a biological process. Two main groups do the work: bacteria, which break down nitrogen‑rich “greens,” and fungi and other microbes, which break down carbon‑rich “browns.” When both groups have the right conditions, the heap heats naturally and the materials break down quickly. Greens include things like grass clippings, fresh plant material, kitchen veg scraps and even coffee grounds (despite being brown in colour, they behave as a nitrogen source). Browns include dried leaves, shredded cardboard, straw and woody stems, all of which add structure and help air move through the heap. Avoid adding cooked food, meat, dairy or diseased plant material, as these can attract pests or introduce problems.
For compost to work well, it needs oxygen, moisture and heat. Composting is an aerobic process, so without oxygen the heap turns slimy and anaerobic. You maintain airflow by building the heap in layers, mixing greens and browns, turning it occasionally and avoiding large, dense layers of wet grass or kitchen waste. Moisture should feel like a wrung‑out sponge — too dry and decomposition slows, too wet and the heap collapses and loses oxygen. If it’s dry, add water or more greens; if it’s wet, add shredded cardboard or straw. Heat is simply a sign of microbial activity. A warm heap is breaking down nicely, a hot heap (around 50–65°C) breaks down very quickly, and a cold heap usually needs turning or rebalancing.
The size of the pile also matters. A compost heap ideally needs to be around 1m × 1m × 1m to heat properly. Smaller heaps will still break down, just more slowly, while larger heaps retain heat better and process material faster. How long compost takes depends on the size of the heap, how often you turn it, the balance of materials and the season. Hot composting can be ready in 6–12 weeks, while cold composting usually takes 6–12 months. Both methods produce excellent compost — hot is simply faster.
Turning your compost introduces oxygen and mixes the materials, helping the biology restart if things have slowed down. Turn the heap when it cools, smells sour, looks compacted or after adding a lot of new material. A simple rule is: if it loses heat, turn it. This re‑oxygenates the heap and gets microbial activity going again.
Once finished, homemade compost is gentle, balanced and perfect for healthy plant growth. It continues breaking down on your beds, slowly releasing nutrients and feeding soil life throughout the year. It’s one of the simplest, most effective ways to build long‑term soil fertility in a no‑dig system.
For more composting principles the RHS has an excellent overview.
Cover Cropping For Soil Health
Cover crops are temporary plants grown to protect and enrich your soil whenever a bed is empty. They’re especially helpful in a no‑dig system because they keep the soil covered, feed the microbial life beneath the surface and prevent nutrients from washing away in winter rain. Even a short cover crop period can noticeably improve soil structure and vitality.
Different cover crops offer different benefits, but most flower growers find phacelia, buckwheat, crimson clover, field beans and rye the most reliable. Phacelia and buckwheat grow quickly and are ideal for short gaps between crops. Clover gently fixes nitrogen and supports soil biology, while field beans and rye are better suited to overwintering because they tolerate cold and add more biomass.
You can sow cover crops in late summer or early autumn to protect beds over winter, or in early spring if you want a quick soil‑boosting crop before planting out. Any time a bed will be empty for more than a few weeks, a cover crop is worth considering. It keeps weeds down, prevents compaction and gives the soil something to “do” rather than sitting bare.
When it’s time to clear the bed, you don’t dig the cover crop in. Instead, cut the plants at the base before they set seed, leave the roots in the soil to decompose naturally and lay the tops on the surface as a mulch. Once the material has wilted down, you can plant straight through it. This approach fits seamlessly with no‑dig principles and avoids disturbing the soil structure you’ve worked hard to build.
Fast‑growing covers like phacelia and buckwheat can be left for four to eight weeks, while clover benefits from a slightly longer period. Winter covers such as rye or field beans can stay in place until spring. No matter which you choose, cover cropping is one of the simplest ways to build long‑term soil health without relying on fertilisers or constant amendments.
Watering Outdoors
Deep, infrequent watering encourages strong roots.
Some crops (statice, strawflower, gomphrena) develop better colour with mild drought stress.
Avoid overhead watering, this promotes mildew, sunspots and burning.
Crop‑Specific Growing Guides
Paper‑Textured Flowers
Paper‑textured flowers such as statice, gomphrena, strawflower, ammobium and craspedia thrive in full sun and cope well with dry conditions, making them some of the easiest dried‑flower crops to grow. They’re best harvested when the blooms are one‑third to halfway open. Strawflowers and ammobium continue opening after cutting, so it’s important to harvest once the first couple of rows of petals have opened. Because strawflowers open and close with the sun, cutting them on a bright day ensures you capture them at the correct stage. These crops dry quickly and cleanly, and a dehumidifier can be a huge help if you have one.
For all annual dried‑flower crops — including strawflower, statice, gomphrena, ammobium and ornamental grasses — aim for soil that is free‑draining, not overly rich and only lightly amended. Digging the ground disrupts soil structure and the microbial life that supports healthy growth, so simply remove weeds, loosen the top layer if it’s heavily compacted, and plant directly.
Spiky & Structural
Good airflow is essential for clean drying and strong colour. Harvest when the colour is rich, and dry stems either upright or hanging. Some crops have specific timing needs: globe thistle should be cut before it fully opens to prevent shattering, and delphiniums are best harvested when around one‑third of the florets have opened.
Grasses & Grains
Grasses and grains such as bunny tails, barley, millet and ornamental grasses prefer full sun and should be harvested when the seed heads feel firm. Bunny tails are ready once you begin to see the pollen.
Foliage & Branches
Foliage and branches also offer beautiful dried material — eucalyptus needs warmth and patience to germinate, pussy willow should be cut before the catkins open, physalis is ready when the lanterns are fully coloured, and amaranthus should be harvested when the tassels are firm and not shedding. Cotton requires heat and a long season to form bolls, so in the UK it must be grown in a greenhouse or hoop house, with seeds started indoors in January.
Common Problems & How to Fix Them
Advanced Dried Flower Growing Tips
Seedlings are excellent communicators once you know how to read them, and most problems show up early through changes in colour, shape or growth habit. Leggy seedlings are usually a sign that they aren’t receiving enough light, the light source is too far away, or the environment is too warm. Overcrowding can make this worse, as seedlings stretch to compete. Yellowing, on the other hand, often points to overwatering, compacted soil or a mild nitrogen deficiency. In both cases, improving light levels, adjusting heat and ensuring the soil isn’t waterlogged will help seedlings regain strength. Bottom‑watering and improving drainage can also make a noticeable difference, and once true leaves appear, a gentle feed can correct nutrient imbalances.
Wilting seedlings tend to be suffering from underwatering, heat stress or root disturbance. Watering from below, reducing heat and avoiding unnecessary handling usually brings them back quickly. If seedlings begin flowering while still in their cells, it’s a sign they’re under stress — typically from too much heat, too little light, becoming root‑bound or experiencing nutrient imbalance. Increasing light, reducing heat, potting on earlier and avoiding overcrowding will help redirect their energy back into healthy vegetative growth.
Some crops sulk after transplanting while others take off with a burst of growth, and the difference often comes down to how they’re potted on. Starting seedlings in small trays before moving them into slightly larger pots helps prevent overwatering and reduces the risk of young plants rotting in cold, wet soil. You’ll know it’s time to pot on when roots reach the bottom of the cell, when seedlings have two to three sets of true leaves, or when growth slows despite good conditions. To avoid transplant shock, water the day before, handle seedlings by their leaves rather than the stem, and move them into only slightly larger cells rather than oversized pots. Keeping them out of direct sun for the first 24 hours also helps them settle.
Some crops dislike root disturbance and are best started in larger cells or soil blocks from the beginning. Delphinium, eryngium and globe thistle are particularly sensitive — they resent being moved once their roots have begun to establish, and transplanting them too late can easily set them back or kill them.
Pinching is a simple technique that encourages branching and fuller plants, but it only benefits the right crops and must be done at the right stage. Pinching too early can stunt growth, while pinching too late causes branching too low on the stem. Most pinched crops respond best when they are around 10–15cm tall. Strawflower, amaranthus, gomphrena and celosia spinacata all benefit from pinching, although gomphrena is optional — pinching creates a bushier plant with more blooms, but it also shortens the stems, so skip it if you prefer longer cuts.
Other crops should never be pinched. Statice, craspedia, delphinium and celosia cristata all perform best when left to grow naturally, as pinching disrupts their growth habit and reduces stem quality.
Most dried‑flower crops don’t need succession sowing because many of them are naturally cut‑and‑come‑again or produce over a long flowering window once they get going. For the majority of varieties, a single sowing per season is more than enough. However, there are a few situations where succession sowing can be useful. You might choose to sow in waves if you’re growing a variety that isn’t cut‑and‑come‑again, if you want staggered heights for design work, or if you’d like to spread your harvest over a longer period. It can also be helpful when growing for a specific event where you need a very fresh flush, or simply as a backup if your first sowing is damaged by pests or unexpected weather.
Plant spacing has a big impact on stem length, airflow and mildew resistance. Tighter spacing produces shorter, more uniform stems, while wider spacing encourages longer stems and more branching. As a general guide, strawflower grows well at 25–30cm spacing, statice at around 25cm, and gomphrena at 20–25cm. Amaranthus prefers 30–40cm, achillea around 30cm, and craspedia 20–25cm. Most ornamental grasses thrive at roughly 30cm spacing. Delphiniums need more room, ideally 40–50cm, while celosia varies by type: cristata prefers 15–20cm for one large, impressive head per plant, plumosa grows well at 20–25cm, and spicata at 25–30cm.
Mulching isn’t universally beneficial for dried‑flower crops. Many of them prefer lean, exposed soil, which helps keep growth firm and prevents stems from becoming too soft. That said, mulch does have advantages — it retains moisture and suppresses weeds — so it can be helpful for certain crops. Amaranthus, achillea, eucalyptus and delphinium all respond well to mulching, especially in hot or dry conditions. For most other dried‑flower varieties, leaving the soil bare produces stronger stems and better drying quality.
Most dried‑flower crops tolerate a wide pH range, but some have clear preferences that influence stem strength, colour intensity, mildew resistance and overall vigour. Statice, achillea and gypsophila prefer alkaline soil between pH 7 and 8, with gypsophila struggling in acidic beds. Strawflower and gomphrena grow best in neutral to slightly alkaline soil around pH 6.8–7.5. Many other crops — including gomphrena, craspedia, celosia, most ornamental grasses and physalis — are happy in neutral to slightly acidic soil. Amaranthus, delphinium, cotton and eucalyptus prefer a pH of around 6–7, while lavender and some grasses thrive in slightly acidic conditions between pH 5.8 and 6.5.
A few pests and diseases commonly affect dried‑flower crops, but most are manageable with quick action. Slugs are a persistent problem and can completely destroy young delphiniums if not controlled. Aphids often appear on amaranthus, delphiniums, roses and achillea; a strong water spray, neem oil or encouraging ladybirds usually keeps them in check. Thrips tend to affect strawflowers and statice, and improving airflow while avoiding overcrowding helps reduce damage. Powdery mildew is common on roses, achillea and delphiniums — correct spacing, watering in the morning, watering the soil rather than overhead and removing affected leaves all help prevent spread. Rust can appear on roses and grasses; removing affected leaves and improving airflow usually resolves it.
Once your flowers are fully dried, proper storage is essential for preserving colour and structure. Ideal storage conditions are cool, dark and dry, with low humidity and good airflow. Storing stems in sealed boxes or crates helps protect them from dust and moisture. Avoid direct sunlight, which fades and bleaches flowers, and avoid humidity, which softens stems and encourages mould. Plastic bags should also be avoided because they trap moisture, and sheds or attics are usually too damp or too hot for long‑term storage. With the right conditions, dried flowers can stay beautiful for many months.
Explore More
Visit the Care & Growing section for tutorials, FAQs, and sustainability practices.
Dried Flower Growing Tips
Learn how to grow beautiful flowers for your garden and dried flower arrangements with these practical and clear tips.
Light
Water With Intention
Well-Drained Soil
Cut At The Right Stage
Airflow & Spacing
Nutrients
A Gentle Guide to Growing For Drying
Growing flowers specifically for drying is different from growing for fresh cutting.
You want strong straight stems, saturated colour, clean blemish-free petals, good airflow and predictable drying behaviour.
These dried flower growing tips bring together everything you need from germination to harvest. Grow dried flowers with confidence and intention.
Seed Starting
The Complete Guide
Light-Dependent vs Darkness-Dependent Seeds
Some seeds need light to germinate, while others require darkness — and getting this wrong is one of the most common causes of poor germination. Light‑dependent seeds such as statice, strawflower, gomphrena, ammobium alatum and craspedia should sit on the surface of the compost. Press them in gently and finish with a fine layer of vermiculite rather than compost; it holds moisture beautifully without blocking the light they need.
Other varieties prefer darkness to get started. Delphinium, achillea, bunny tail grasses, barley, millet, eryngium and globe thistle all benefit from being covered lightly after sowing. This thin layer helps create the darkness they need while still allowing enough airflow for healthy germination.
Heat Mats & Temperature Control
Most dried‑flower crops germinate best between 18–22°C, and a heat mat can be incredibly helpful for keeping temperatures steady during early spring or winter sowing. Once your seedlings emerge, remove the mat straight away — staying on bottom heat encourages them to stretch, producing thin, weak stems. If seedlings begin to grow rapidly upwards, develop pale, spindly stems or show leaves curling upward, they’re telling you they’re too warm and need cooler conditions.
Humidity Domes
Humidity domes are useful for germination but should be removed once seedlings begin to grow. Venting the dome daily helps prevent damping‑off, and once around half to two‑thirds of your seeds have sprouted, it’s time to take it off completely. If you notice heavy condensation dripping back onto the compost, the environment is too wet and needs more airflow.
Grow Lights — Intensity, Duration & Distance
This is the stage where most growers struggle. Seedlings need far more light than a windowsill can provide — even a bright south‑facing window rarely reaches the intensity required for strong, compact growth. Using a simple phone app such as Illuminance – Lux Light Meter makes it easy to check your setup. Aim for around 5,000–8,000 lux for germination, increasing to 10,000–15,000 lux for early growth and up to 20,000 lux as plants approach hardening‑off.
Keep LED panels roughly 20–30 cm above the canopy and adjust the height weekly as seedlings grow. Too little light leads to legginess and weak growth, while too much can cause leaf stress, bleaching or crisp edges. Seedlings thrive with 14–16 hours of light per day, followed by a proper period of darkness — they need rest just as much as they need illumination.
Signs of insufficient light include leaning towards the source, long internodes and a pale green colour. Too much light, on the other hand, shows up as bleaching, downward‑curling leaves or crisping at the edges.
Light Colour & Spectrum (White vs Red/Blue Grow Lights)
Grow lights generally fall into two categories: full‑spectrum white or red/blue “blurple” lights. Both will raise healthy seedlings, but they behave differently. Full‑spectrum white LEDs mimic natural daylight and are by far the easiest to work with, especially for beginners. They give you a clear view of your plants, provide a balanced mix of wavelengths and encourage compact, naturally coloured growth. They’re also much more pleasant to have in your workspace.
Red/blue spectrum lights focus on the wavelengths plants use most efficiently — blue for compact, leafy growth and red for root and flower development. They can be slightly more efficient, but the harsh colour makes it harder to judge plant health, and they’re not necessary for the seedling stage. In practice, full‑spectrum white LEDs are ideal for seed starting and early growth because they offer excellent results without needing to fine‑tune anything. This is what I use for all my dried‑flower seedlings.
Reflective Foil & Light Maximisation
Lining the sides of your grow area with reflective foil or Mylar. (I’ve even used tin foil!) Lining the sides of your grow area with reflective foil or Mylar helps make the most of your lighting setup. Even simple kitchen foil works surprisingly well. Reflective surfaces bounce light back onto the seedlings, improving uniformity, reducing stretching and preventing plants from leaning in one direction. Just avoid placing foil too close to the lights, as it can create hotspots that stress young plants.
Watering Seedlings
Seedlings respond best to bottom‑watering, which keeps the foliage dry and reduces the risk of damping‑off. Fill the tray beneath your cells or pots for around 10–20 minutes, then pour away any excess so the roots aren’t left sitting in water. Consistency is key — too much water leads to yellowing, algae on the soil surface, soft stems and, in the worst cases, fungus gnats that can damage young roots. Too little water causes wilting, papery leaves and stalled growth. Aim for evenly moist compost that never swings to extremes.
Soil Mixes — The Flores & Bloom Standard
A well‑balanced soil mix will support your seedlings for months, which is especially important when you’re sowing early and plants spend longer in trays. I use a peat‑free compost as the base, ideally sieved to remove any larger woody pieces so the texture stays fine and even. To this, I add perlite for drainage and vermiculite for moisture balance, creating a structure that holds water without becoming heavy or compacted.
For nutrition, a small amount of blood, fish and bone provides slow‑release support, and a sprinkle of worm castings adds extra microbial life — not essential, but lovely if you have them. A touch of seaweed feed rounds out the mix with micronutrients that help seedlings stay strong and resilient. Seeds don’t need nutrients to germinate, but once they develop their first true leaves, they rely on this balanced mix to grow steadily, especially if they’ll be staying in trays for a while.
Seedling Behaviour & Troubleshooting
Why Some Flowers Bloom in Their Cells
Premature flowering is almost always a stress response. When seedlings experience too much heat, too little light, overcrowding, nutrient imbalance or become rootbound, they can switch into survival mode and begin blooming far earlier than they should. Paper‑textured flowers such as statice, strawflower and gomphrena are particularly prone to this, and the same applies to celosia and delphiniums. Once a plant decides to flower in its cell, it’s difficult to reverse, so keeping conditions steady is the best prevention.
Signs of Stress
Seedlings communicate their discomfort long before they fail, and learning to read these signals makes troubleshooting far easier. Purple leaves often point to cold stress or a phosphorus deficiency, while yellowing can indicate overwatering or a lack of nitrogen. Curling foliage usually means the plant is dealing with heat or light stress, and stunted growth is a classic sign of low light or a rootbound cell. Spotting these early allows you to adjust conditions before the plant diverts energy into survival behaviours like premature flowering.
Fungus Gnats
Fungus gnats thrive in damp compost, and once they appear, they can be frustratingly persistent. Their larvae feed on the delicate roots of young seedlings, sometimes severing them entirely — if a seedling snaps off at soil level with no roots attached, this is usually the culprit. Breaking the cycle requires a combination of cultural controls: bottom‑watering only, allowing the surface to dry between waterings, and adding a thin layer of sand or vermiculite to discourage adults from laying eggs. Sticky traps are excellent for reducing adult numbers, and if the infestation becomes severe, beneficial nematodes can help bring it under control.
Hardening Off & Moving Outdoors
Acclimatisation Schedule
Acclimatisation prevents shock when seedlings move from a controlled indoor environment to the unpredictability of outdoors. This transition is essential — sudden changes in temperature, wind or light can stunt growth, set plants back for weeks or, in the worst cases, kill them. A gentle, steady approach helps seedlings toughen up without becoming stressed.
A simple seven‑day plan works beautifully. For the first two days, place seedlings outside for one to two hours in full shade. On days three and four, increase this to three or four hours in dappled light. By day five, they can enjoy morning sun only, followed by half a day of sun on day six. By day seven, they should be ready for full sun and normal outdoor conditions. Always pause the schedule if night temperatures fall below 5°C (41°F), as cold stress can undo all their progress.
Netting for Straight Stems
Horizontal netting supports strawflowers, celosia, delphinium, achillea and grasses. Install early so stems grow through naturally.
Outdoor Growing Conditions
Soil Preparation
Most dried‑flower crops thrive in free‑draining, low‑fertility soil — but that doesn’t mean you need to strip your beds or avoid feeding altogether. The aim is simply to prevent the kind of rich, nitrogen‑heavy ground that encourages lush, floppy stems. A gentle, no‑dig approach works beautifully. Digging disrupts soil structure and the living ecosystem within it, so instead, remove weeds, loosen only the top layer if it’s heavily compacted, and plant directly into the bed.
Annuals
Annuals such as strawflower, statice, gomphrena, amaranthus and ornamental grasses perform best in soil that drains well, isn’t overly rich and has only light amendments. Preparing the bed can be as simple as working in a small amount of organic blood, fish and bone before planting. Add compost only if your soil is extremely poor or sandy, and avoid manure or high‑nitrogen feeds, which create soft stems and weak growth. This gentle approach gives annuals enough nutrition for the season without pushing them into lush, floppy foliage.
Perennials
Perennials like achillea, eryngium, globe thistle, lavender and delphinium benefit from a slightly different preparation. Dig a planting hole and sprinkle in mycorrhizal fungi to support strong root establishment, then add a handful of blood, fish and bone before backfilling and watering well. Avoid adding heavy organic matter — too much compost or manure leads to soft stems, flopping, mildew, reduced vase life, slower drying and weaker colour retention. Dried‑flower crops of all kinds perform far better in leaner soil, where they grow strong, upright and richly coloured.
No Dig Growing
A no‑dig approach works beautifully for dried‑flower crops. It protects soil structure, supports beneficial fungi and reduces weed pressure — all without the disruption of heavy digging. By keeping the soil ecosystem intact, you create a healthier, more resilient growing environment that your plants can tap into naturally.
To prepare a no‑dig bed, start by removing any surface weeds. Add a thin layer of compost only if needed — one to two centimetres is usually enough. If you’re working with heavy clay or dealing with persistent weeds, lay down cardboard first and then add a couple of inches of compost on top. Avoid turning or digging the soil beneath; simply plant directly into the bed, creating small holes where needed.
No‑dig works particularly well for dried flowers because it preserves the soil structure and the micro‑organisms that help deliver nutrients to your plants. It also protects the mycorrhizal networks that form natural partnerships with roots, improving nutrient uptake and overall plant health. With less compaction and a more stable soil environment, plants grow stronger, straighter and more abundant — and the reduced labour is always a welcome bonus. This gentle approach encourages strong, upright stems.
Worm Castings
Worm castings are the fine, dark, crumbly granules left behind after composting worms break down organic matter — they look a little like soft, earthy coffee grounds and are one of the most nutrient‑balanced soil amendments you can use. They’re incredibly gentle, packed with beneficial microbes and help seedlings access nutrients without overwhelming them or pushing soft, sappy growth. A small amount mixed into beds or seedling compost improves moisture retention, boosts soil life and supports steady, resilient development.
If you’d like a regular supply, a simple worm farm is easy to set up at home: a ventilated box, a layer of damp cardboard for bedding and a handful of composting worms are all you need. Feed them thin layers of kitchen scraps, keep the bedding moist but never wet, and within a few months you’ll have beautifully rich castings ready to sift into your soil — a slow, natural way to strengthen your plants from the ground up.
Using Mycorrhizal Fungi For Stronger Roots
Mycorrhizal fungi form a natural partnership with plant roots, helping them access water and nutrients far more efficiently. They’re especially valuable for perennials, slow‑establishing plants and anything with a deep or woody root system, which is why they pair so well with no‑dig gardening — digging can disrupt these delicate underground networks. They’re particularly beneficial for crops such as eucalyptus, achillea, eryngium, globe thistle, lavender, delphinium and physalis, all of which thrive when their roots can form strong, long‑term fungal connections. Plants treated with mycorrhizal fungi tend to establish more quickly, cope better with drought, and experience far less transplant shock, giving them a healthier foundation for years to come.
To apply it, simply sprinkle the granules directly onto the roots or into the planting hole before backfilling and watering well. It only needs to be used once at planting — it isn’t a fertiliser and doesn’t require reapplying. Once the fungi are in the soil, they remain there, continuing to support the plant throughout its life. It’s a small step that makes a noticeable difference, especially in lean or free‑draining soil, where plants benefit most from the improved access to moisture and nutrients.
Making Your Own Compost
Homemade compost is one of the best things you can add to your garden. It’s naturally balanced, gentle, and full of the biology your soil needs to stay healthy. Composting is simply the controlled breakdown of organic matter using oxygen, moisture and heat. When these three elements are in balance, the heap warms up and decomposes efficiently, turning garden waste into a rich, crumbly material that continues feeding your soil long after you’ve spread it.
At its core, composting is a biological process. Two main groups do the work: bacteria, which break down nitrogen‑rich “greens,” and fungi and other microbes, which break down carbon‑rich “browns.” When both groups have the right conditions, the heap heats naturally and the materials break down quickly. Greens include things like grass clippings, fresh plant material, kitchen veg scraps and even coffee grounds (despite being brown in colour, they behave as a nitrogen source). Browns include dried leaves, shredded cardboard, straw and woody stems, all of which add structure and help air move through the heap. Avoid adding cooked food, meat, dairy or diseased plant material, as these can attract pests or introduce problems.
For compost to work well, it needs oxygen, moisture and heat. Composting is an aerobic process, so without oxygen the heap turns slimy and anaerobic. You maintain airflow by building the heap in layers, mixing greens and browns, turning it occasionally and avoiding large, dense layers of wet grass or kitchen waste. Moisture should feel like a wrung‑out sponge — too dry and decomposition slows, too wet and the heap collapses and loses oxygen. If it’s dry, add water or more greens; if it’s wet, add shredded cardboard or straw. Heat is simply a sign of microbial activity. A warm heap is breaking down nicely, a hot heap (around 50–65°C) breaks down very quickly, and a cold heap usually needs turning or rebalancing.
The size of the pile also matters. A compost heap ideally needs to be around 1m × 1m × 1m to heat properly. Smaller heaps will still break down, just more slowly, while larger heaps retain heat better and process material faster. How long compost takes depends on the size of the heap, how often you turn it, the balance of materials and the season. Hot composting can be ready in 6–12 weeks, while cold composting usually takes 6–12 months. Both methods produce excellent compost — hot is simply faster.
Turning your compost introduces oxygen and mixes the materials, helping the biology restart if things have slowed down. Turn the heap when it cools, smells sour, looks compacted or after adding a lot of new material. A simple rule is: if it loses heat, turn it. This re‑oxygenates the heap and gets microbial activity going again.
Once finished, homemade compost is gentle, balanced and perfect for healthy plant growth. It continues breaking down on your beds, slowly releasing nutrients and feeding soil life throughout the year. It’s one of the simplest, most effective ways to build long‑term soil fertility in a no‑dig system.
For more composting principles the RHS has an excellent overview.
Cover Cropping For Soil Health
Cover crops are temporary plants grown to protect and enrich your soil whenever a bed is empty. They’re especially helpful in a no‑dig system because they keep the soil covered, feed the microbial life beneath the surface and prevent nutrients from washing away in winter rain. Even a short cover crop period can noticeably improve soil structure and vitality.
Different cover crops offer different benefits, but most flower growers find phacelia, buckwheat, crimson clover, field beans and rye the most reliable. Phacelia and buckwheat grow quickly and are ideal for short gaps between crops. Clover gently fixes nitrogen and supports soil biology, while field beans and rye are better suited to overwintering because they tolerate cold and add more biomass.
You can sow cover crops in late summer or early autumn to protect beds over winter, or in early spring if you want a quick soil‑boosting crop before planting out. Any time a bed will be empty for more than a few weeks, a cover crop is worth considering. It keeps weeds down, prevents compaction and gives the soil something to “do” rather than sitting bare.
When it’s time to clear the bed, you don’t dig the cover crop in. Instead, cut the plants at the base before they set seed, leave the roots in the soil to decompose naturally and lay the tops on the surface as a mulch. Once the material has wilted down, you can plant straight through it. This approach fits seamlessly with no‑dig principles and avoids disturbing the soil structure you’ve worked hard to build.
Fast‑growing covers like phacelia and buckwheat can be left for four to eight weeks, while clover benefits from a slightly longer period. Winter covers such as rye or field beans can stay in place until spring. No matter which you choose, cover cropping is one of the simplest ways to build long‑term soil health without relying on fertilisers or constant amendments.
Watering Outdoors
Deep, infrequent watering encourages strong roots.
Some crops (statice, strawflower, gomphrena) develop better colour with mild drought stress.
Avoid overhead watering, this promotes mildew, sunspots and burning.
Crop‑Specific Growing Guides
Paper‑Textured Flowers
Paper‑textured flowers such as statice, gomphrena, strawflower, ammobium and craspedia thrive in full sun and cope well with dry conditions, making them some of the easiest dried‑flower crops to grow. They’re best harvested when the blooms are one‑third to halfway open. Strawflowers and ammobium continue opening after cutting, so it’s important to harvest once the first couple of rows of petals have opened. Because strawflowers open and close with the sun, cutting them on a bright day ensures you capture them at the correct stage. These crops dry quickly and cleanly, and a dehumidifier can be a huge help if you have one.
For all annual dried‑flower crops — including strawflower, statice, gomphrena, ammobium and ornamental grasses — aim for soil that is free‑draining, not overly rich and only lightly amended. Digging the ground disrupts soil structure and the microbial life that supports healthy growth, so simply remove weeds, loosen the top layer if it’s heavily compacted, and plant directly.
Spiky & Structural
Good airflow is essential for clean drying and strong colour. Harvest when the colour is rich, and dry stems either upright or hanging. Some crops have specific timing needs: globe thistle should be cut before it fully opens to prevent shattering, and delphiniums are best harvested when around one‑third of the florets have opened.
Grasses & Grains
Grasses and grains such as bunny tails, barley, millet and ornamental grasses prefer full sun and should be harvested when the seed heads feel firm. Bunny tails are ready once you begin to see the pollen.
Foliage & Branches
Foliage and branches also offer beautiful dried material — eucalyptus needs warmth and patience to germinate, pussy willow should be cut before the catkins open, physalis is ready when the lanterns are fully coloured, and amaranthus should be harvested when the tassels are firm and not shedding. Cotton requires heat and a long season to form bolls, so in the UK it must be grown in a greenhouse or hoop house, with seeds started indoors in January.
Common Problems & How to Fix Them
Advanced Dried Flower Growing Tips
Seedlings are excellent communicators once you know how to read them, and most problems show up early through changes in colour, shape or growth habit. Leggy seedlings are usually a sign that they aren’t receiving enough light, the light source is too far away, or the environment is too warm. Overcrowding can make this worse, as seedlings stretch to compete. Yellowing, on the other hand, often points to overwatering, compacted soil or a mild nitrogen deficiency. In both cases, improving light levels, adjusting heat and ensuring the soil isn’t waterlogged will help seedlings regain strength. Bottom‑watering and improving drainage can also make a noticeable difference, and once true leaves appear, a gentle feed can correct nutrient imbalances.
Wilting seedlings tend to be suffering from underwatering, heat stress or root disturbance. Watering from below, reducing heat and avoiding unnecessary handling usually brings them back quickly. If seedlings begin flowering while still in their cells, it’s a sign they’re under stress — typically from too much heat, too little light, becoming root‑bound or experiencing nutrient imbalance. Increasing light, reducing heat, potting on earlier and avoiding overcrowding will help redirect their energy back into healthy vegetative growth.
Some crops sulk after transplanting while others take off with a burst of growth, and the difference often comes down to how they’re potted on. Starting seedlings in small trays before moving them into slightly larger pots helps prevent overwatering and reduces the risk of young plants rotting in cold, wet soil. You’ll know it’s time to pot on when roots reach the bottom of the cell, when seedlings have two to three sets of true leaves, or when growth slows despite good conditions. To avoid transplant shock, water the day before, handle seedlings by their leaves rather than the stem, and move them into only slightly larger cells rather than oversized pots. Keeping them out of direct sun for the first 24 hours also helps them settle.
Some crops dislike root disturbance and are best started in larger cells or soil blocks from the beginning. Delphinium, eryngium and globe thistle are particularly sensitive — they resent being moved once their roots have begun to establish, and transplanting them too late can easily set them back or kill them.
Pinching is a simple technique that encourages branching and fuller plants, but it only benefits the right crops and must be done at the right stage. Pinching too early can stunt growth, while pinching too late causes branching too low on the stem. Most pinched crops respond best when they are around 10–15cm tall. Strawflower, amaranthus, gomphrena and celosia spinacata all benefit from pinching, although gomphrena is optional — pinching creates a bushier plant with more blooms, but it also shortens the stems, so skip it if you prefer longer cuts.
Other crops should never be pinched. Statice, craspedia, delphinium and celosia cristata all perform best when left to grow naturally, as pinching disrupts their growth habit and reduces stem quality.
Most dried‑flower crops don’t need succession sowing because many of them are naturally cut‑and‑come‑again or produce over a long flowering window once they get going. For the majority of varieties, a single sowing per season is more than enough. However, there are a few situations where succession sowing can be useful. You might choose to sow in waves if you’re growing a variety that isn’t cut‑and‑come‑again, if you want staggered heights for design work, or if you’d like to spread your harvest over a longer period. It can also be helpful when growing for a specific event where you need a very fresh flush, or simply as a backup if your first sowing is damaged by pests or unexpected weather.
Plant spacing has a big impact on stem length, airflow and mildew resistance. Tighter spacing produces shorter, more uniform stems, while wider spacing encourages longer stems and more branching. As a general guide, strawflower grows well at 25–30cm spacing, statice at around 25cm, and gomphrena at 20–25cm. Amaranthus prefers 30–40cm, achillea around 30cm, and craspedia 20–25cm. Most ornamental grasses thrive at roughly 30cm spacing. Delphiniums need more room, ideally 40–50cm, while celosia varies by type: cristata prefers 15–20cm for one large, impressive head per plant, plumosa grows well at 20–25cm, and spicata at 25–30cm.
Mulching isn’t universally beneficial for dried‑flower crops. Many of them prefer lean, exposed soil, which helps keep growth firm and prevents stems from becoming too soft. That said, mulch does have advantages — it retains moisture and suppresses weeds — so it can be helpful for certain crops. Amaranthus, achillea, eucalyptus and delphinium all respond well to mulching, especially in hot or dry conditions. For most other dried‑flower varieties, leaving the soil bare produces stronger stems and better drying quality.
Most dried‑flower crops tolerate a wide pH range, but some have clear preferences that influence stem strength, colour intensity, mildew resistance and overall vigour. Statice, achillea and gypsophila prefer alkaline soil between pH 7 and 8, with gypsophila struggling in acidic beds. Strawflower and gomphrena grow best in neutral to slightly alkaline soil around pH 6.8–7.5. Many other crops — including gomphrena, craspedia, celosia, most ornamental grasses and physalis — are happy in neutral to slightly acidic soil. Amaranthus, delphinium, cotton and eucalyptus prefer a pH of around 6–7, while lavender and some grasses thrive in slightly acidic conditions between pH 5.8 and 6.5.
A few pests and diseases commonly affect dried‑flower crops, but most are manageable with quick action. Slugs are a persistent problem and can completely destroy young delphiniums if not controlled. Aphids often appear on amaranthus, delphiniums, roses and achillea; a strong water spray, neem oil or encouraging ladybirds usually keeps them in check. Thrips tend to affect strawflowers and statice, and improving airflow while avoiding overcrowding helps reduce damage. Powdery mildew is common on roses, achillea and delphiniums — correct spacing, watering in the morning, watering the soil rather than overhead and removing affected leaves all help prevent spread. Rust can appear on roses and grasses; removing affected leaves and improving airflow usually resolves it.
Once your flowers are fully dried, proper storage is essential for preserving colour and structure. Ideal storage conditions are cool, dark and dry, with low humidity and good airflow. Storing stems in sealed boxes or crates helps protect them from dust and moisture. Avoid direct sunlight, which fades and bleaches flowers, and avoid humidity, which softens stems and encourages mould. Plastic bags should also be avoided because they trap moisture, and sheds or attics are usually too damp or too hot for long‑term storage. With the right conditions, dried flowers can stay beautiful for many months.
Explore More
Visit the Care & Growing section for tutorials, FAQs, and sustainability practices.