
How to Make a Dried Flower Bouquet:
Handheld & Vase Arrangement Tutorial
Easy Step-by-Step Instructions to Make a Beautiful, Natural DIY Dried Flower Bouquet & Handheld Arrangements
Time needed: around 20-30 minutes.
A dried flower bouquet is a beautiful, long‑lasting alternative to fresh flowers — perfect for weddings, gifting, home décor, or simply enjoying seasonal colour all year round. Dried flowers are lightweight, durable, and easy to work with, making them ideal for beginners and experienced makers alike. Below, you’ll find two separate tutorials: one for creating a handheld dried flower bouquet, and one for arranging dried flowers in a vase.
Materials Needed

Scissors
Dried Flowers & Foliage (25-40 stems)
Florist Tape (optional)
Twine / String
Ribbon
If you’re growing your own flowers, our growing tips page shares how to get strong, healthy blooms that dry beautifully.
Handheld Flower Bouquet Tutorial
Step 1 – Choose and Prepare Your Stems
Select Your Focal, Filler and Textural Stems
Select a balanced mix of dried flowers in your chosen palette. A handheld bouquet usually includes:

- Focal stems (5-8 stems)
(strawflower, roses, helichrysum, hydrangea) - Filler stems (10-15 stems)
(statice, limonium, achillea, gomphrena) - Textural accents (8-15 stems)
(grasses, bunny tails, oats, phalaris, pods)
Trim stems to 20–30 cm or your desired length and remove any loose petals or broken pieces so the bouquet looks clean and intentional.
For a large bridal bouquet consider using 40-60 stems.
Step 2 – Build the Bouquet Shape
Using the spiral method

- Start by creating a simple V‑shape with your first two stems: hold one stem angled slightly to the left, and place a second stem angled slightly to the right. This creates an open, balanced base that stops the bouquet becoming flat or top‑heavy later on.
- With the V‑shape in your hand, begin adding stems one at a time to each side, always placing each new stem at a slight angle and rotating the bouquet gently after every addition. This rotation encourages the stems to fall into a natural spiral, giving the bouquet its rounded, professional shape.
- Alternate between focal flowers, fillers, and textures as you build. Keep colours and shapes evenly distributed, and let some stems sit a little higher or lower to create movement. If the bouquet starts to look too tight or too flat, adjust the angle of the next few stems to open it back up.
By the time you’ve added all your stems, the bouquet should feel balanced, airy, and comfortable to hold, with the spiral clearly visible at the base.
Step 3 – Secure and Finish the Bouquet
Finishing touches.

- Once you’re happy with the shape, wrap the stems tightly with twine or florist tape. Trim the ends so they’re neat and even.
- Finish the handle with ribbon, twine, or fabric. Silk and velvet give a soft, romantic look; linen or cotton create a natural, rustic finish. Tie a bow or leave long trailing ends for added elegance.
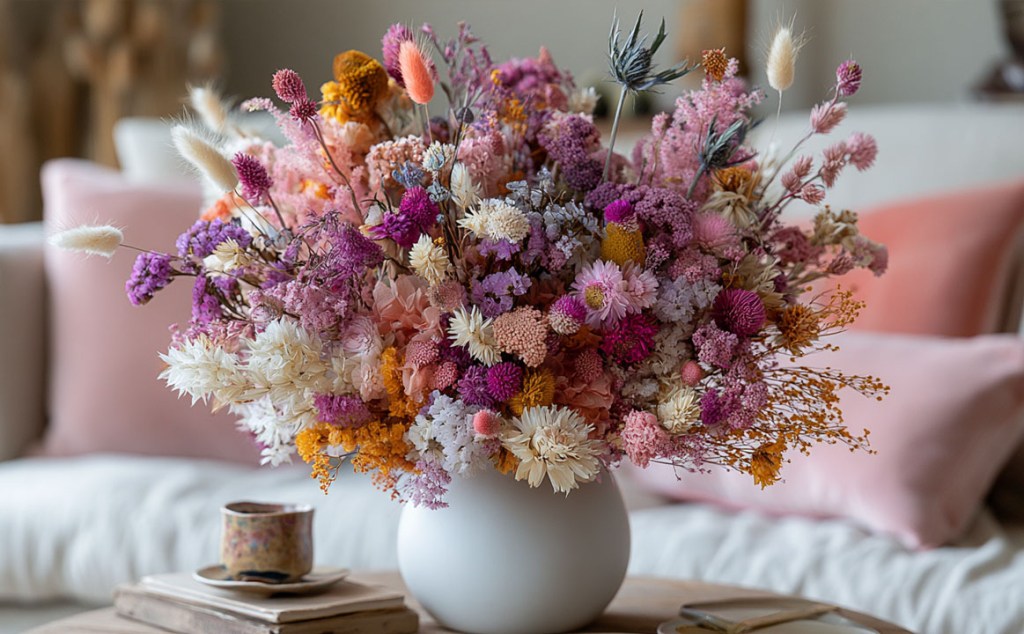
Vase Arrangement Tutorial
Step 1 – Prepare Your Vase & Stems
Select Your Focal, Filler and Textural Stems
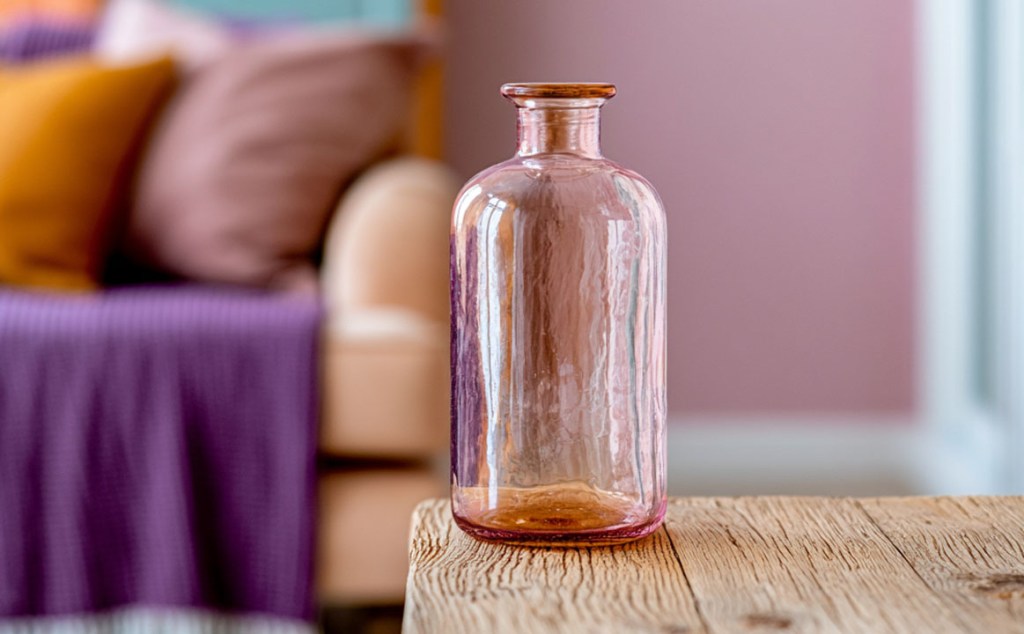
Choose a vase that suits your style — ceramic, glass, metal, or stoneware all work beautifully with dried flowers. If the opening is wide, create a small tape grid across the top or use a flower frog to help hold stems in place.
- Focal stems (5-7 stems)
(strawflower, roses, helichrysum, hydrangea) - Structural stems (5-8 stems)
(miscanthus, pampas, eucalyptus, branches, broom grass) - Filler stems (6-10 stems)
(statice, limonium, achillea, lavender, gomphrena) - Textural accents (4-10 stems)
(bunny tails, oats, poppy pods, phalaris, pods)
Trim stems to 15–25 cm, depending on the height of your vase.
Total stems: 20-35.
Step 2 – Create the Structure
Set the height and shape
- Begin with your structural stems — grasses, branches, or tall fillers. These set the height and overall shape of the arrangement.
- Add focal flowers next, placing them at different angles so the arrangement feels natural and airy. Avoid clustering all focal stems in one area.
Step 3 – Fill and Refine
Finishing touches.
- Add smaller stems and textural accents to fill gaps and soften edges. Let some pieces arc outward or drape slightly to create movement.
- Step back occasionally to check the balance from all sides. Dried flowers hold their shape, so once you’re happy with the placement, the arrangement will stay looking perfect for months or even years.
Troubleshooting
Crafting with dried flowers can be delicate, so here are quick fixes for the most common issues people run into.
My bouquet looks flat or one‑sided
Rotate the stems more as you build, or add a few taller stems to restore height and movement.
My handheld bouquet feels loose
Re‑wrap the stems with twine or tape, pulling slightly tighter. Dried stems can shift if not secured firmly.
The vase arrangement looks too heavy in one area
Remove one focal stem from the dense section and replace it with lighter textures like grasses or bunny tails.
Stems keep slipping in the vase
Use a tape grid or a flower frog to stabilise the structure.
Colours look muddled
Group similar tones together or add a few lighter stems to break up darker areas.
FAQs
How long do dried flower bouquets and arrangements last?
With proper care, dried bouquets can last for years.
Do dried flowers shed?
Some delicate varieties may shed slightly. Choose sturdy stems for bouquets that will be handled often.
Can I make a dried bouquet in advance?
Absolutely — dried flowers are ideal for early preparation, especially for weddings and events.
What’s the best vase shape for dried flowers?
Narrow‑neck vases support stems well, while wide‑mouth vases benefit from a tape grid or frog.
Have a question that’s not answered here? Check out our full FAQ page.
Care Instructions
Dried flowers are delicate but long-lasting. Store your bouquet or arrangement somewhere dry and out of direct sunlight to prevent colours from fading. Avoid crushing or bending the flowers and handle the flowers delicately. If dust gathers over time, gently blow it away or use a soft brush. For long-lasting results, follow our simple dried flower care guide to keep your stems looking their best.
Enjoy Your Dried Flower Display!
Enjoy your dried flower arrangement – a long-lasting, beautifully textured bouquet that’s perfect for weddings, bridesmaids, DIY craft projects, home décor, table centrepieces, or simply creating your own keepsake of eternal blooms.
Want to see more DIY dried flower projects? View our tutorials page.

How to Make a
Dried Flower Bouquet.
Handheld & Vase
Arrangement Tutorial
Easy Step-by-Step Instructions to Make a Beautiful, Natural DIY Dried Flower Bouquet & Handheld Arrangements
Time needed: around 20-30 minutes.
A dried flower bouquet is a beautiful, long‑lasting alternative to fresh flowers — perfect for weddings, gifting, home décor, or simply enjoying seasonal colour all year round. Dried flowers are lightweight, durable, and easy to work with, making them ideal for beginners and experienced makers alike. Below, you’ll find two separate tutorials: one for creating a handheld dried flower bouquet, and one for arranging dried flowers in a vase.
Materials Needed
Scissors
25-40 Dried Stems
Florist Tape (optional)
Twine / String
Ribbon
If you’re growing your own flowers, our growing tips page shares how to get strong, healthy blooms that dry beautifully.
Choose your tutorial:
Handheld Flower Bouquet Tutorial
Step 1
Choose & Prepare Your Stems
Select Your Focal, Filler and Textural Stems
Select a balanced mix of dried flowers in your chosen palette. A handheld bouquet usually includes:
- Focal stems (5-8 stems)
(strawflower, roses, helichrysum, hydrangea) - Filler stems (10-15 stems)
(statice, limonium, achillea, gomphrena) - Textural accents (8-15 stems)
(grasses, bunny tails, oats, phalaris, pods)
Trim stems to 20–30 cm or your desired length and remove any loose petals or broken pieces so the bouquet looks clean and intentional.
For a large bridal bouquet consider using 40-60 stems.
Step 2
Build the Bouquet Shape
Using the spiral method
- Start by creating a simple V‑shape with your first two stems: hold one stem angled slightly to the left, and place a second stem angled slightly to the right. This creates an open, balanced base that stops the bouquet becoming flat or top‑heavy later on.
- With the V‑shape in your hand, begin adding stems one at a time to each side, always placing each new stem at a slight angle and rotating the bouquet gently after every addition. This rotation encourages the stems to fall into a natural spiral, giving the bouquet its rounded, professional shape.
- Alternate between focal flowers, fillers, and textures as you build. Keep colours and shapes evenly distributed, and let some stems sit a little higher or lower to create movement. If the bouquet starts to look too tight or too flat, adjust the angle of the next few stems to open it back up.
By the time you’ve added all your stems, the bouquet should feel balanced, airy, and comfortable to hold, with the spiral clearly visible at the base.
Step 3
Secure and Finish the Bouquet
Finishing touches.
- Once you’re happy with the shape, wrap the stems tightly with twine or florist tape. Trim the ends so they’re neat and even.
- Finish the handle with ribbon, twine, or fabric. Silk and velvet give a soft, romantic look; linen or cotton create a natural, rustic finish. Tie a bow or leave long trailing ends for added elegance.
Vase Arrangement Tutorial
Step 1
Prepare Your Vase & Stems
Select Your Focal, Filler and Textural Stems
Choose a vase that suits your style — ceramic, glass, metal, or stoneware all work beautifully with dried flowers. If the opening is wide, create a small tape grid across the top or use a flower frog to help hold stems in place.
- Focal stems (5-7 stems)
(strawflower, roses, helichrysum, hydrangea) - Structural stems (5-8 stems)
(miscanthus, pampas, eucalyptus, branches, broom grass) - Filler stems (6-10 stems)
(statice, limonium, achillea, lavender, gomphrena) - Textural accents (4-10 stems)
(bunny tails, oats, poppy pods, phalaris, pods)
Trim stems to 15–25 cm, depending on the height of your vase.
Total stems: 20-35.
Step 2
Create the Structure
Set the height and shape
- Begin with your structural stems — grasses, branches, or tall fillers. These set the height and overall shape of the arrangement.
- Add focal flowers next, placing them at different angles so the arrangement feels natural and airy. Avoid clustering all focal stems in one area.
Step 3
Fill and Refine
Finishing touches.

- Add smaller stems and textural accents to fill gaps and soften edges. Let some pieces arc outward or drape slightly to create movement.
- Step back occasionally to check the balance from all sides. Dried flowers hold their shape, so once you’re happy with the placement, the arrangement will stay looking perfect for months or even years.
Troubleshooting
Crafting with dried flowers can be delicate, so here are quick fixes for the most common issues people run into.
My bouquet looks flat or one‑sided
Rotate the stems more as you build, or add a few taller stems to restore height and movement.
My handheld bouquet feels loose
Re‑wrap the stems with twine or tape, pulling slightly tighter. Dried stems can shift if not secured firmly.
The vase arrangement looks too heavy in one area
Remove one focal stem from the dense section and replace it with lighter textures like grasses or bunny tails.
Stems keep slipping in the vase
Use a tape grid or a flower frog to stabilise the structure.
Colours look muddled
Group similar tones together or add a few lighter stems to break up darker areas.
FAQs
How long do dried flower bouquets and arrangements last?
With proper care, dried bouquets can last for years.
Do dried flowers shed?
Some delicate varieties may shed slightly. Choose sturdy stems for bouquets that will be handled often.
Can I make a dried bouquet in advance?
Absolutely — dried flowers are ideal for early preparation, especially for weddings and events.
What’s the best vase shape for dried flowers?
Narrow‑neck vases support stems well, while wide‑mouth vases benefit from a tape grid or frog.
Have a question that’s not answered here? Check out our full FAQ page.
Care Instructions
Dried flowers are delicate but long-lasting. Store your bouquet or arrangement somewhere dry and out of direct sunlight to prevent colours from fading. Avoid crushing or bending the flowers and handle the flowers delicately. If dust gathers over time, gently blow it away or use a soft brush. For long-lasting results, follow our simple dried flower care guide to keep your stems looking their best.
Enjoy Your Dried Flower Display!
Enjoy your dried flower arrangement – a long-lasting, beautifully textured bouquet that’s perfect for weddings, bridesmaids, DIY craft projects, home décor, table centrepieces, or simply creating your own keepsake of eternal blooms.
Want to see more DIY dried flower projects? View our tutorials page.